Test: Foxconn Blackops - UK
Bundkort, Intel d. 19. juli. 2008, skrevet af Polarfar 0 Kommentarer. Vist: 19056 gange.
Billed behandling:
Oversættelse:
Pristjek på http://www.pricerunner.dk
Produkt udlånt af: Foxconn
DK distributør: Frode Herløv
Layout / Design
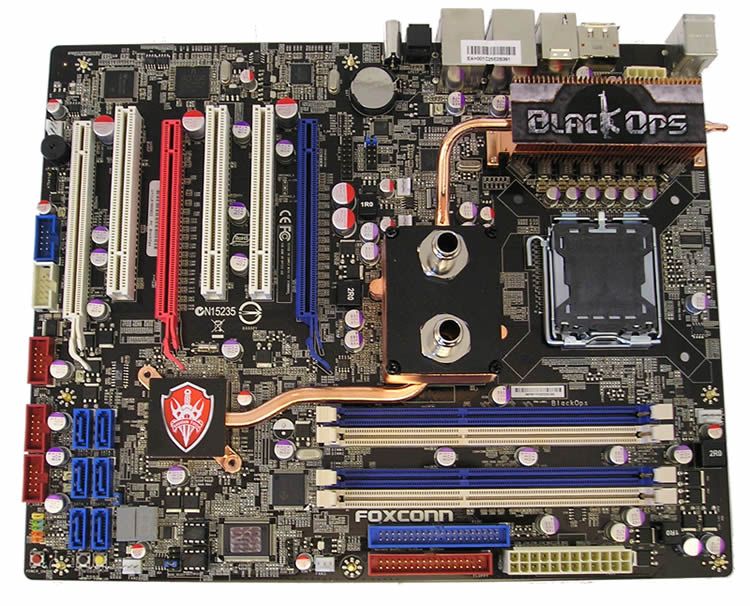
Lets take a closer look at the Blackops board shall we. It has a dark PCB and toned down colors for the rest of the components, just like the MARS model. It almost looks a bit OEM-like, but in this case it does not matter. The enormeus coolingblock on the northbridge makes a design statement, and all in all the board has a very serious look. An important detail to be mentioned, is that the cooling system is mounted with screws, and relatively easy to disassemble. This actually costs quite a lot in the productionline, since you have to have a worker with a screwdriver to do the assembly.
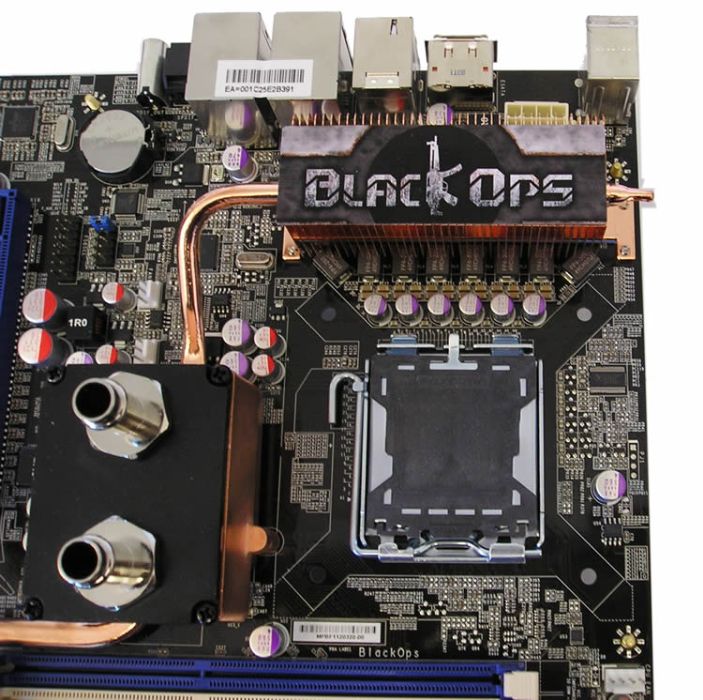
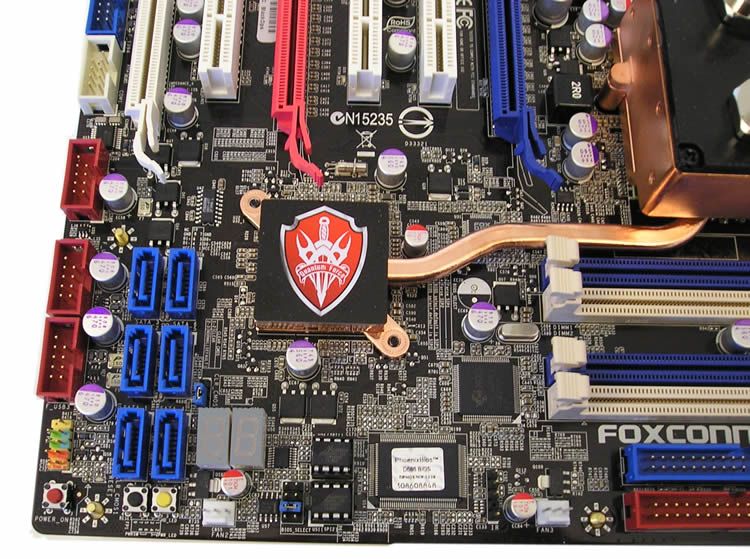
But this is good news for us, coz now we can get down and dirty and get rid of the original cooling paste if you feel the need for some Ceramic paste instead. Let us turn our attention to the cpu socket and the big cooling block. The area around the cpu is not littered with components due to the new digital 8 phase powersupply, hidden under the massive heatsink with the Blackops logo.
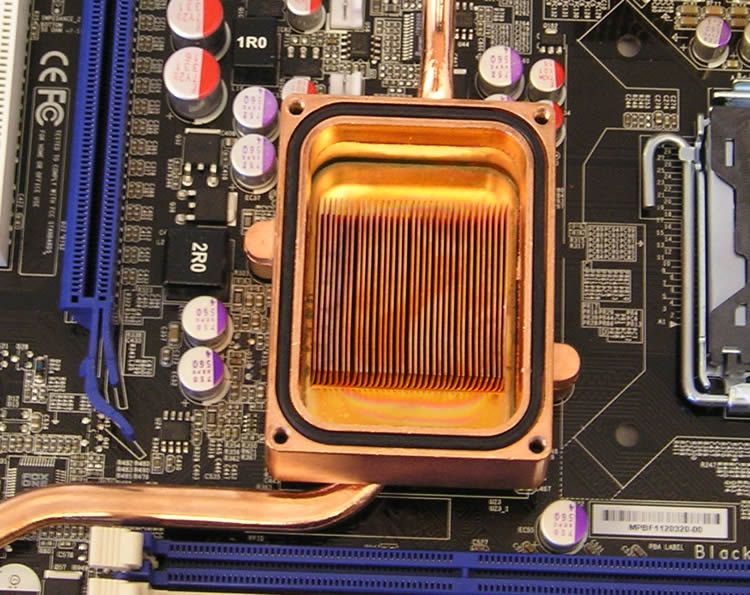
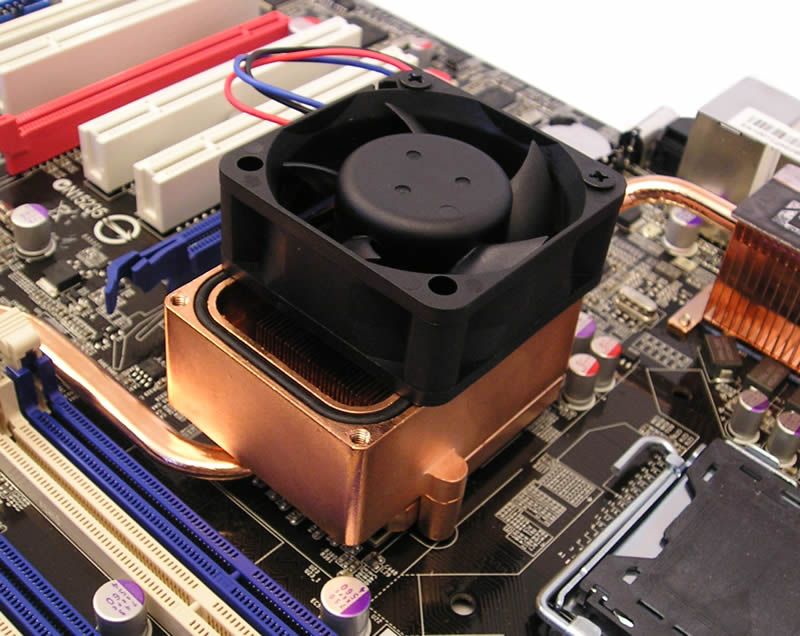
The coolingblock is factory fitted with a watercoolingtop. The top can be removed and underneath is a hollow with a row of copperfins.
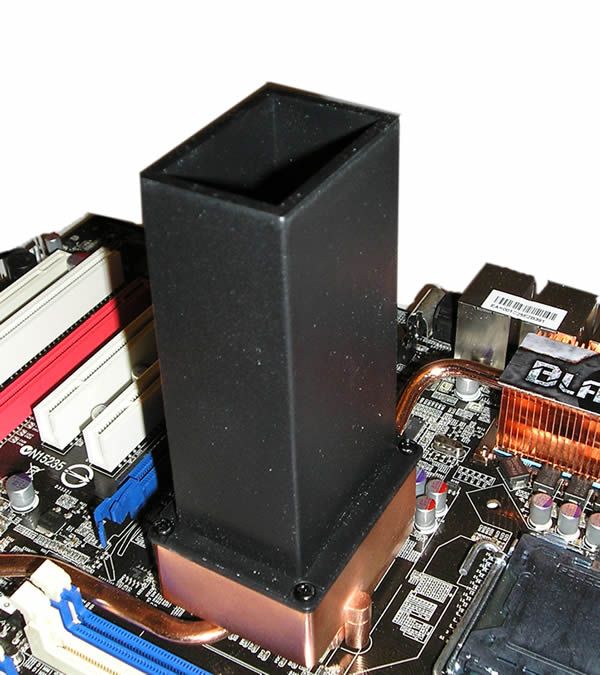
That gives us a large surface to remove the heat form the chipset, wether you opt for air, water or ice. The 60mm fan from the bundle fits onto the block with two screws, and the coolingtower for ice/LN2 use the same scews as well.
That only leaves for us to pour some LN2 down the hole. I would think twice if I were you though, before we have a new iceage on the electronics - or maybe more of a meltdown. Severe cold and metal at room temperature, will form icecrystals and condensation that will kill the board instantly, if you do not properly prepare the PCB. I will show you why on the overclocking page.
A bit further south is, you guessed it, the southbridge with all the SATA, USB and the rest of the connectors. There is an oldfashioned 7-segment display to give you a Hex-code readout of the boot sequence, to help you with any trobleshooting.
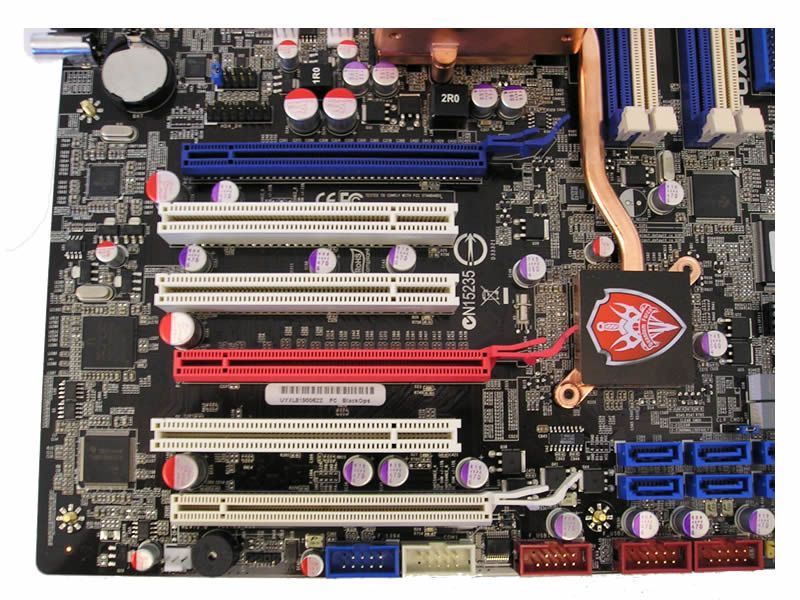
There are no PCIe x1 sockets on the Blackops, but instead there are three x16 ports for graphics cards, and three old-school PCI ports. There is room for three dual-slot graphicscards and one PCI adapter if you bleed your wallet.
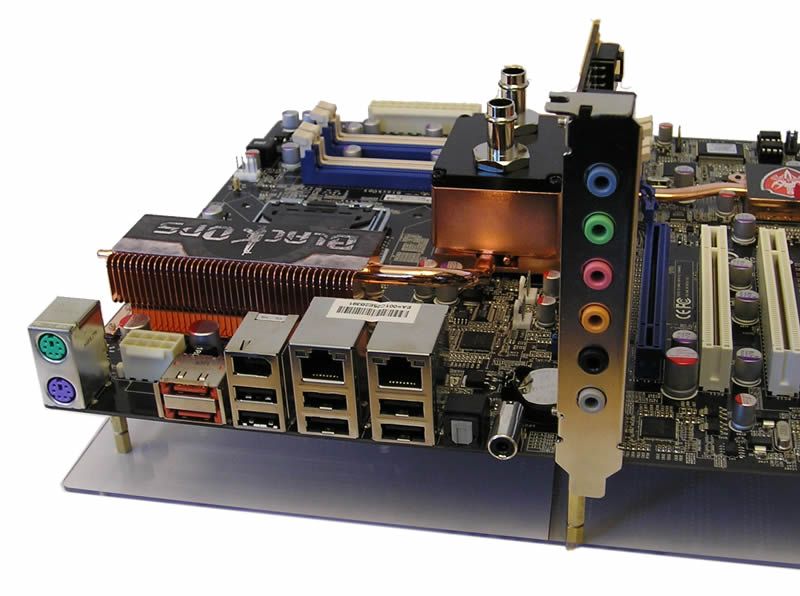
This last photo shows the Blackops mounted on the mountingplate with the soundcard in place for a full overview of the IO options.
I do not know why there is a gap between the PS/2 plugs and the eSATA, but on the other hand I cannot think of anything that might fit in, that we do not already have. The digital outputs mising on the SONAR card itself are placed on the motherboard, and activates when you install the SONAR. All in all I think everything we need is represented on the IO panel.
Anmeld
Information

